3D Printers Buyers Guide
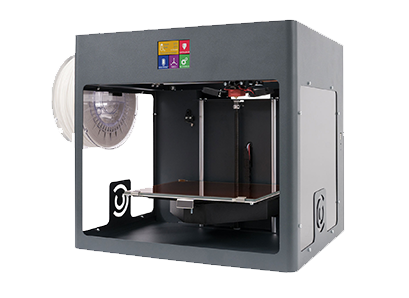
3D printing is a manufacturing process where successive layers of material are laid down on top of each other in an additive process. Although 3D printing is often spoken of as a new technology, it has actually been around for over 30 years. Around a decade ago, patents around 3D printing began to expire and it was opened up to mass audiences, with previously large industrial machines now being available in more compact desktop designs.
This guide will take you through the technologies found in desktop models today, and how they may differ to make a certain type of 3D printer better suited to any given job. It is worth mentioning that although this group of devices share the name ‘printer’ with many paper based traditional printers, they have very little in common - more can be learnt about ‘regular' printers in our
Printers Buyers Guide.
Why 3D Print?
Every 3D printer builds parts based on the same main principle: a digital model is turned into a physical three-dimensional object by adding material a layer at a time. This is where the term ‘additive’ manufacturing comes from. 3D printing is a fundamentally different way of producing parts compared to traditional ‘subtractive’ manufacturing such as CNC machining or ‘formative' manufacturing such as injection moulding. In 3D printing, no special tools are required (for example, a cutting tool with certain geometry or a mould). Instead the part is manufactured directly onto the built platform layer-by-layer, which leads to a unique set of benefits, but also some limitations.
3D Printing Benefits
Geometric complexity at no extra cost
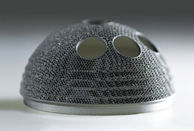
3D printing allows easy fabrication of complex shapes, many of which cannot be produced by any other manufacturing method. The additive nature of the technology means that geometric complexity does not come at a higher price. Parts with complex or organic geometry optimised for performance cost just as much to 3D print as simpler parts designed for traditional manufacturing (and sometimes even cheaper since less material is used).
Low start-up costs
Since 3D printing does not need any specialised tooling, there are essentially no start-up costs. The cost of a 3D printed part depends only on the amount of material used, the time it took the machine to print it and the post-processing - if any - required to achieve the desired finish.
Simple customisation
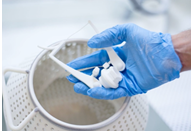
3D printing allows for easy customisation. Since start-up costs are so low, you only needs to change the digital 3D model to create a custom part. So each and every item can be customised to meet a user's specific needs without impacting the manufacturing costs.
Low cost prototyping
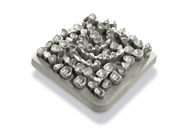
One of the main uses of 3D printing today is prototyping - both for form and function. This is done at a fraction of the cost of other processes and at speeds that no other manufacturing technology can compete with.
Large range of materials
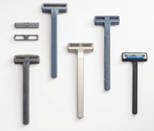
The most common 3D printing materials used today are plastics, but options also includes speciality materials with properties tailored for specific applications. 3D printed parts today can have high heat resistance, high strength or stiffness and can even be biocompatible.
3D Printing Limitations
Lower strength
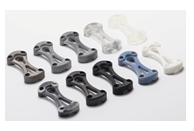
Generally, 3D printed parts have physical properties that are not as good as a bulk material: since they are built layer-by-layer, they are weaker and more brittle in one direction by approximately 10% to 50%. Because of this, plastic 3D printed parts are most often used for non-critical functional applications.

More costly at higher volumes
3D printing cannot compete with traditional manufacturing processes when it comes to large production runs. The lack of a custom tool or mould means that start-up costs are low, so prototypes and a small number of identical parts (up to ten) can be manufactured economically. However, it also means though that the unit price decreases only slightly at higher quantities, so economies of scale cannot kick in.
Limited accuracy & tolerances
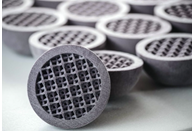
The accuracy of 3D printed parts depends on the process and the calibration of the machine. Typically, parts printed on a desktop 3D printer have the lowest accuracy and will print with tolerances of ± 0.5 mm. For example, this means that if you design a hole with diameter of 10 mm, the true diameter after printing will be something between 9.5 mm to 10.5 mm.
Post processing requirement
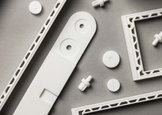
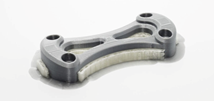
Printed parts are rarely ready to use off the printer. For example, support removal is needed in most 3D printing processes. 3D printers cannot add material on thin air, so supports are structures that are printed with the part to add material under an overhang or to anchor the printed part on the build platform. When removed, they often leave marks or blemishes on the surface of the part they came in contact with. These areas then need additional operations (sanding, smoothing or painting) to achieve a high-quality surface finish.
Uses of 3D Printers
Many industries have now adopted 3D printing within their business models to benefit from the factors we’ve mentioned above. Just a handful of these are listed here.

Architecture
Typically, architects can spend days creating physical models to explain their designs to clients. Using modern technology, they can use their existing CAD drawings to rapidly create a model and print it in 3D. Not only do they save time but complex geometries that can’t be modelled by hand can be produced efficiently and at a low cost.

Prosthetics
Affordable desktop 3D printers are being used to create custom prosthetics for children at a very low production cost. Being such a low-cost option benefits children in particular because they grow out of their prosthetics quickly. Additionally, 3D printing allows children to choose custom options for their prosthetics such as superhero designs.

Medical
One of the key benefits of 3D printing is the ability to customise objects at no extra cost. The medical sector is taking advantage of this in various ways and one prominent field is that of hearing aids. The process begins by taking a 3D scan of the patient’s ear, which ensures an accurate 3D print can be made that has a perfect fit for that specific patient.

Product Design
3D printing enables product and industrial designers to create prototypes within hours as opposed to weeks through traditional methods. The cost to create a prototype can be in excess of £10,000 when you consider the tooling required for processes like injection moulding. With 3D printing, prototypes can be achieved at a fraction of the cost.

Aerospace
3D printing for aerospace purposes allows complex geometries to be created with no waste material and no tooling required. This results in innovative functional parts and huge savings. Larger jet engines can now be produced that are more efficient, lighter and powerful due to its 3D printed components.

Home Use
Desktop 3D printers can now be acquired for well under £1,000, which has gained the interest of many hobbyists. One of the main benefits is unlimited spare parts without having to rely on external sources. Uses can easily improve their designs and create new and better concepts.
How 3D Printers Work
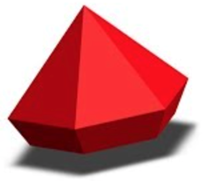
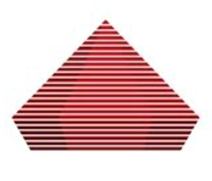
So now we’re familiar with what it is and how it can be used, let’s look at how it works in detail. The process always begins with a digital 3D model - the blueprint of the physical object. This model can be created in a 3D design software package, of which there are many on the market. Typically the 3D digital model in then saved in either an STL or OBJ file format. Some models will also support GIF, JPG and PNG file formats too. The 3D printer then has software that slices the 3D file into thin, 2-dimensional layers and then turned into a set of instructions in machine language (called G-code) for the printer to execute.
3D Model
Typically, architects can spend days creating physical models to explain their designs to clients. Using modern technology, they can use their existing CAD drawings to rapidly create a model and print it in 3D. Not only do they save time but complex geometries that can’t be modelled by hand can be produced efficiently and at a low cost.
Sliced Model
Affordable desktop 3D printers are being used to create custom prosthetics for children at a very low production cost. Being such a low-cost option benefits children in particular because they grow out of their prosthetics quickly. Additionally, 3D printing allows children to choose custom options for their prosthetics such as superhero designs.
Printing
One of the key benefits of 3D printing is the ability to customise objects at no extra cost. The medical sector is taking advantage of this in various ways and one prominent field is that of hearing aids. The process begins by taking a 3D scan of the patient’s ear, which ensures an accurate 3D print can be made that has a perfect fit for that specific patient.
From here, the way a 3D printer works varies by the process it uses to make the physical model. There are many types of 3D printing processes - resin stereolithography, sheet lamination, material jetting, vat polymerisation to name a few, however these tend to be more industrial means. The common desktop method is a material extrusion technique commonly called Fused Deposition Modelling (FDM) or Fused Filament Fabrication (FFF).
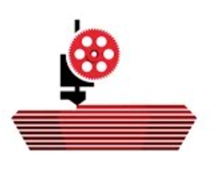
In FDM or FFF printing, a spool of filament is loaded into the printer and then fed to the extrusion head, which is equipped with a heated nozzle. Once the nozzle reaches the desired temperature, a motor drives the filament through it, melting it. The printer moves the extrusion head, laying down melted material at precise locations, where it cools and solidifies (like a very precise hot-glue gun). When a layer is finished, the build platform moves down and the process repeats until the part is complete.
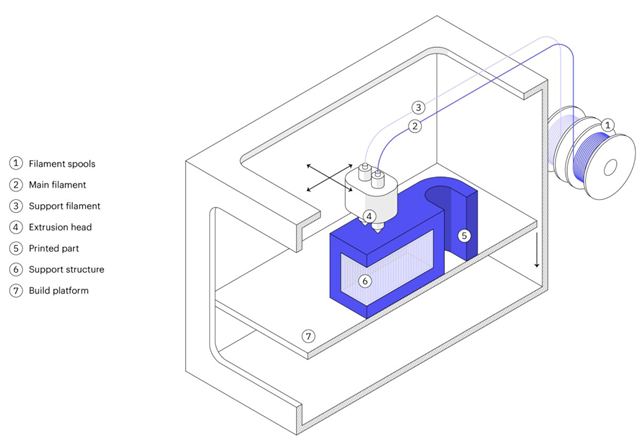
FDM or FFF printing is the most cost-effective way of producing custom thermoplastic parts and prototypes. It also has the shortest lead times due to the high availability of the technology. A wide range of thermoplastic materials is available for this technique, suitable for both prototyping and some functional applications. As for limitations, this technique has the lowest dimensional accuracy and resolution compared to the more industrial 3D printing technologies. Furthermore, as extruded parts are likely to have visible layer lines, post-processing is often required for a smooth surface finish.
Support removal is typically the first stage of post-processing for any 3D printing technologies that require a support to accurately produce parts. Support can generally be separated into two categories; standard and dissolvable. Standard support material can generally be removed from the print with little effort, and cleaning of support material in hard to reach places (like holes or hollows) can be achieved with dental picks and needle-nose pliers. Well placed support structures, and proper print orientation, can greatly reduce aesthetic impact of support material on the final print.
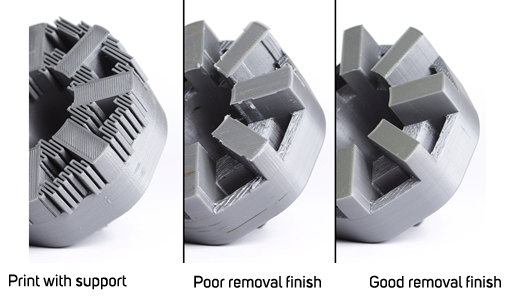
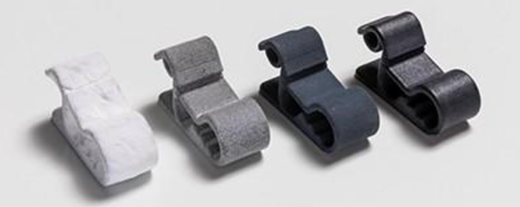
With a dissolvable support, the support materials will differ depending on the types of filament being used, but all are removed from a print by placing the print in a bath of solvent appropriate to the material until the support elements have dissolved. The part will then be finished using techniques such as sanding, polishing, priming and painting to achieve the finished article.
3D Printer Resolution
When 3D printing, the resolution refers to the quality, or level of detail, at which your part is created. In general, the printer’s movement on both the XY and Z planes determines how fine the resolution will be, with smaller movements typically yielding higher resolutions. Resolution numbers will be shown in microns whilst the nozzle diameter will be shown in millimetres (mm). The lower these two numbers are, the finer detail is possible.
XY Resolution
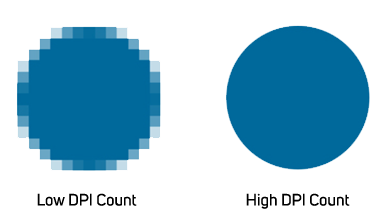
The XY resolution of a part occurs on the horizontal plane, which runs parallel to the printer’s build platform or bed. The XY resolution is defined by the smallest movement that a 3D printer’s print head can make on this plane. The print quality of the XY resolution depends on how fine the movements of the printer’s motors are as well as the diameter of the print nozzle. As these numerical values decrease, the resolution becomes finer, and smaller features are able to be defined. It is important to note that the XY resolution may never be finer than the diameter of the print head nozzle (some printers have interchangeable nozzle heads with varying diameters to offer more flexibility). A good analogy for XY resolution is DPI, or dots per inch. Digital screens are made up of a grid of thousands of pixels. The more pixels the screen has in one square inch, the more detail it can resolve. Similarly, the finer a 3D printer’s motor can turn, the more “dots” in can fit in a square inch, resulting in more detailed parts.
Z Resolution
The other part determining resolution is the Z resolution, which occurs on the vertical plane. This is more commonly referred to as layer thickness or layer height. When a 3D printer creates an object from a design file, it first slices the part into hundreds or thousands of cross sections with the thickness of each cross section being equal to the layer height. The shorter the layer height, the more layers there are per vertical inch and the higher the resolution of your parts.
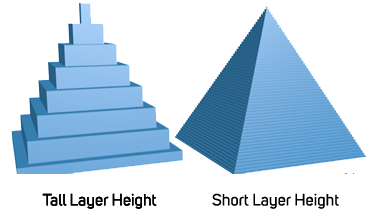
These layers can be visible and may even make the surface appear rough, particularly for curved or diagonal faces. Because this visibility is more prominent than the XY resolution, many manufacturers refer to print resolution as only consisting of the Z plane measurement. For a higher Z resolution, layers must be made smaller so that it takes more layers to construct the entire part and finer details and transitions can be made. Doing so increases the build time of the print, but it can also create a smoother transition along the face of an object.
Minimum feature size is a term that refers to the smallest “dot” a printer can make. This is determined by the diameter of the nozzle on the 3D printer and the height of one layer. Regardless of how close or far apart these dots are, however, keep in mind that any features on your model that are smaller than an individual dot will not resolve correctly when printed. To produce finer features, a printer with a smaller minimum feature size will be required.
3D Printer Features
Now we’re familiar with the process of how 3D printing works, it's time to look at the features of 3D printers. Before you buy a 3D printer, it helps to know what you want to print. 3D printers are available in a multitude of sizes which will have a bearing on the objects you print, but additionally they may have different nozzle sizes, finer layer resolution and better axis adjustability
Footprint and Size
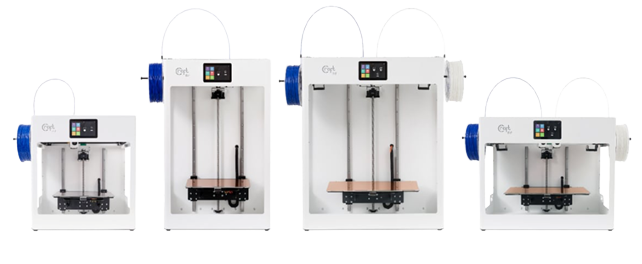
Desktop 3D printers come in a variety of sizes and clearly the size of the unit will restrict the size of the prints that can be made, so this is the first thing you should consider. A larger size model will allow for greater flexibility in what you can create both in length, height and overall volume. It is also worth mentioning that although a printer will have a physical platform or bed size, you may not be able to use the entirety of it depending on the software you are using to create your 3D model. It is worth checking compatibilities of these prior to purchase. The differences may only amount to a centimetre or less, but are worth knowing if you plan to print items that require the whole physical bed dimensions.
Build Platform
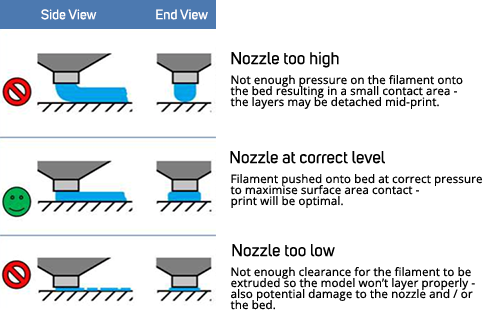
Among the most sought-after 3D printer features is a self-levelling build platform or bed. Many printers come with auto bed levelling features where a sensor tests various points on the print bed to best calculate the distance between the nozzle and print bed. Then, software adjustments ensure that the nozzle maintains the correct distance from the bed while printing. Although some users may prefer manual bed levelling, an auto-levelling 3D printer bed offers a fairly plug-and-print experience which massively streamlines the printing process.
If the bed is not level, not only will your print not be produced properly as the layers won’t match up. Even on a level bed, you can also risk damage to you printer if the nozzle gets too close to the bed, or risk your print breaking if the nozzle is too far away. For these reasons and the obvious simplicity an auto-levelling bed is recommended.
It is also worth considering a heated bed. The first few layers of your prints are critical to the foundation of your final object. A heated bed ensures this foundation is well-formed, solid, and sticking in place. Finding the ideal temperature differs between filament types but you can find the sweet spot by experimenting - most will offer quite a wide temperature range.
Dual Filament Support
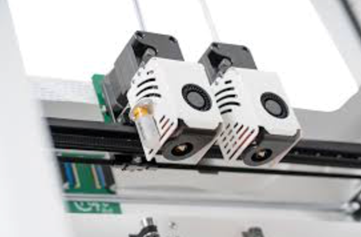
You don't have to have dual filament support to get multicoloured prints, but it does help make it easier. Instead of relying on multicoloured spools of filament, consider looking for a 3D printer that supports more than one roll at a time. You can slice G-code files to alternate between the colours gradually, switch on a specific layer, or even apply a colour to specific part of a print-in-place object.
Another key advantage of a dual extruder printer is that you can print using multiple materials. This opens up the complexity of shapes that you can print and also allows you to make use of the functional properties of two complimentary materials.
Printer Speed
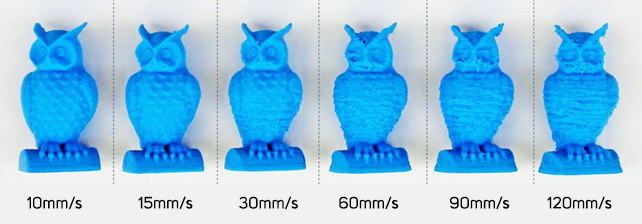
The speed of 3D printing is determined by two main factors - firstly the speed range that the printer is capable of and this can vary from 10 - 200 millimetres per second (mm/s). Secondly, as 3D printing speed is usually set in the slicing software that you use to prepare your 3D model for printing, the production time will be affected depending how fast you set this. Typically, faster 3D printing speed means lower quality, though. Above 150mm/s, the quality drops noticeably, and you may experience problems as the filament tends to slip at these speeds.
If you’re merely printing for fun, speed might not matter quite as much. However, for business purposes, 3D printing speed may be more of an issue. For smaller print jobs, faster speeds don’t usually impact the quality, but for larger prints item, faster production may come at the expense of the finer details, and may even create problems such as banding.
It’s worth mentioning that not all printers will have a print resume feature. This makes sure that your creations aren't interrupted when unexpected pauses occur. Instead of having to start again, your print job will resume where it left off, making the end result faster.
Noise
Noise from 3D printer can be a huge factor. The average 3D printer is around 50 decibels, which is as loud as a normal conversation. The main things that make a 3D printer loud are motors, fans, bearings and drivers. Lower cost printers do tend to be a lot noisier due to the cheaper mechanical parts installed and result in more vibrations. Physical set up can contribute to the noise level - a slower print will always result in less noise and tricks such as placing your printer on a solid surface, on top of a padded mat or carpet, will act to dampen surfaces to aid noise reduction.
Safety Features
You can never be too safe when it comes to working with hot electrical equipment - a 3D printer will operate in the region of 180°C to 300°C, depending on what material you are using. A heated bed can also reach over 150°C. So it is worth keeping an eye out for safety features that will help your 3D printing experience — this includes things such as automatic nozzle cooling when a print is complete. If the printer has a heated bed, look for a feature that automatically shuts it off when a print job ends. Some printers also move the nozzle away from the object when you pause the job or the print finishes — preventing heat damage and excess filament from forming.
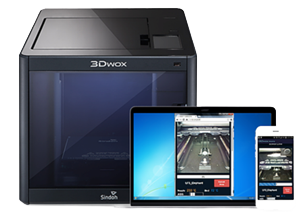
Another feature worth looking out for is a built in camera - this allows the remote monitoring of the printer whilst in operation. The printer can then be left to produce your item, but without you needing to be directly next to it to ensure no problems occur. It can also be used to create time lapse images of your item being printed.
In addition to any of the printer’s safety features, it is always wise to wear gloves whilst removing prints or adjusting the machine. Additionally, printing in a well-ventilated area is advisable, as the filaments may give off harmful fumes and nanoparticles as the filaments are melted and extruded.
Connectivity
As previously mentioned the 3D software file must be transferred to the printer in order to print. This can be achieved in a number of ways. Using a direct USB cable connection will give you the opportunity to monitor and control the device manually from the printing software at any point (most softwares support this). This functionality might be useful especially with home setups where monitoring the printer operating parameters can help you find possible issues and things that you might be able to work on to improve.
Many mid-range 3D printers will usually also come with either an SD card reader or a separate USB port for direct upload from flash drives. This allows you to have the printer operate independently, not needing to be connected to a computer all the time or at all as you can load the models onto the device itself (there is usually a small internal storage capacity).
High-end 3D printers are likely to feature additional options such as a network port (LAN) or even wireless connectivity options. This can be especially useful if you are planning on sharing the printer between multiple users, enabling 3D files to be sent to the printer from anywhere on the network. A printer with an inbuilt camera also allows remote monitoring to be done over a network.
3D Printer Filaments
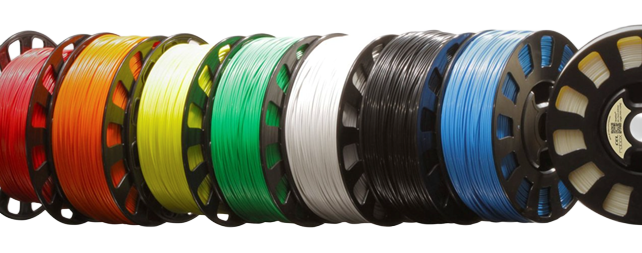
As we’ve seen FDM / FFF 3D printers use spools of filament to produce the 3D designs. These filaments can be made from a wide variety of materials so let’s take a look at some of the most popular ones.
PLA
In the realm of consumer 3D printing, polylactic acid (PLA) is easily the most popular filament type. First and foremost, PLA is easy to print with, has a low printing temperature and it doesn’t warp easily, meaning it doesn’t require a heated bed (although it definitely helps). Another benefit of using PLA is that it doesn’t give off an odour during printing. Another appealing aspect of PLA is that it’s available in a nearly endless abundance of colours and styles. Finally, as a biodegradable thermoplastic, PLA is more environmentally friendly than most types of 3D printer filament, being made from annually renewable resources such as corn starch or sugar cane.
• Strength: High | Flexibility: Low | Durability: Medium
• Difficulty to use: Low
• Print temperature: 180°C – 230°C
• Print bed temperature: 20°C – 60°C (but not needed)
• Shrinkage / warping: Minimal
• Soluble: No
Although PLA filaments are suitable for most uses, compared to other types of 3D printer filament, it is brittle, so it is best to avoid using it when making items that might be bent, twisted, or dropped repeatedly, such as phone cases, high-wear toys, or tool handles. You should also avoid using it with items that need to withstand higher temperatures, as PLA tends to deform around temperatures of 60°C or higher. For all other applications, PLA makes for a good overall choice in 3D printer filament.
ABS
Acrylonitrile butadiene styrene (ABS) typically ranks as the second most popular 3D printer filament, after PLA. With respect to its material properties, ABS is actually moderately superior to PLA, despite being slightly more difficult to print with. Products made of ABS boast high durability and a capacity to withstand high temperatures, but 3D printer enthusiasts should be mindful of the filament’s high printing temperature, tendency to warp during cooling, and intense, potentially hazardous fumes, so always print with a heated bed and in a well-ventilated space.
• Strength: High | Flexibility: Medium | Durability: High
• Difficulty to use: Medium
• Print temperature: 210°C – 250°C
• Print bed temperature: 80°C – 110°C
• Shrinkage / warping: Considerable
• Soluble: In esters, ketones, and acetone
ABS is tough so able to withstand high stress and temperature. It’s also moderately flexible, though there are certainly better options for that further down the list. Together these properties make ABS a good general-purpose 3D printer filament, but where it really shines is with items that are frequently handled, dropped, or heated.
PETG
Polyethylene terephthalate glycol-modified (PETG) is derived from the most commonly used plastic in use today, but this modified form is clearer, less brittle, and most importantly, easy to print with. For this reason, PETG is often considered a good middle ground between ABS and PLA, as it is more flexible and durable than PLA and easier to print than ABS.
• Strength: High| Flexibility: Medium | Durability: High
• Difficulty to use: Low
• Print temperature: 220°C – 250°C
• Print bed temperature: 50°C – 75°C
• Shrinkage/warping: Minimal
• Soluble: No
PETG is a good all-rounder but stands out from many other types of 3D printer filament due to its flexibility, strength, and resistance to both high temperature and impact. This makes it an ideal 3D printer filament to use for functional objects which might experience sustained or sudden stress, such as mechanical parts, printer parts, and protective components. It should be noted however that PETG is hygroscopic, meaning it absorbs moisture from the air. As this has a negative effect on the material, make sure to store the 3D printer filament in a cool, dry place.
Nylon
Compared to most other types of 3D printer filament, Nylon ranks as the number one contender when considering strength, flexibility, and durability together. It can also be dyed, either before or after the printing process.
• Strength: High | Flexibility: High | Durability: High
• Difficulty to use: Medium
• Print temperature: 240°C – 260°C
• Print bed temperature: 70°C – 100°C
• Shrinkage/warping: Considerable
• Soluble: No
Nylon’s strength, flexibility, and durability allows it to be used to create tools, functional prototypes, or mechanical parts - however nylon, like PETG, is hygroscopic, so it must be stored in a cool, dry place to keep the filament in prime condition, ensuring better quality prints.
HIPS
High impact polystyrene (HIPS) is used in the 3D printing world as support. For instance, when paired with ABS in a dual extrusion printer, HIPS acts as an excellent support material, as they are of similar strength, stiffness, and require a comparable print temperature. Although its primary use is as a support material, HIPS is a good 3D printer filament in its own right. It is stronger than both PLA and ABS, warps less than ABS, and can easily be glued, sanded, and painted.
• Strength: High | Flexibility: Medium | Durability: High
• Difficulty to use: Medium
• Print temperature: 210°C – 250°C
• Print bed temperature: 80°C – 110°C
• Shrinkage / warping: Considerable
• Soluble: In limonene
It is worth noting though that if you use HIPS as a support material it does limit your printing to ABS, as other 3D printer filament materials will be damaged by the limonene required to dissolve it afterwards.
There are too many more options for filament material to cover every possibility in this guide. The wide range available includes polycarbonate (PC), polyvinyl alcohol (PVA), polypropylene (PP), carbon fibre, wood, ceramic and metal filaments. Plus ones with specific properties like conductivity, magnetism, and the ability to change colour with temperature or glow in the dark.
The best 3D printers
Hopefully, you’ve found this 3D printer guide useful in advising the considerations that should come into purchasing a printer. Click on the links below to explore our ranges of 3D printers and filaments.

